

About Comp AI Device Agent
Comp AI Device Agent is a lightweight desktop application that runs in your system tray and automatically monitors your device’s security compliance. It checks your device configuration every hour and reports the results to your organization’s Comp AI portal. The agent checks four security areas:
Your device is compliant when all four checks pass.
The agent runs silently in your system tray and uses minimal system resources. It does not collect
personal data, browsing history, or file contents.
System Requirements
Installation
Step 1: Download the Agent
Step 1: Download the Agent
Log in to your organization’s Employee Portal and navigate to the Device Agent task. Click Download Agent to get the installer for your operating system.
- macOS: Downloads a
.dmgfile. If you have an Apple Silicon Mac (M1/M2/M3/M4), the portal selects the correct version automatically. You can also switch between Apple Silicon and Intel using the dropdown. - Windows: Downloads a
.exeinstaller. - Linux: Downloads a
.debpackage.
Step 2: Install the Agent
Step 2: Install the Agent
macOS: Double-click the downloaded
.dmg file and drag the Comp AI Device Agent to your Applications folder.Windows: Double-click the downloaded .exe file and follow the installation wizard.Linux: Install the downloaded .deb package using your package manager or by double-clicking it:Step 3: Sign In
Step 3: Sign In
After installation, the agent opens a sign-in window. Log in with your work email using the same method you use for the Employee Portal (email OTP, Google, or Microsoft).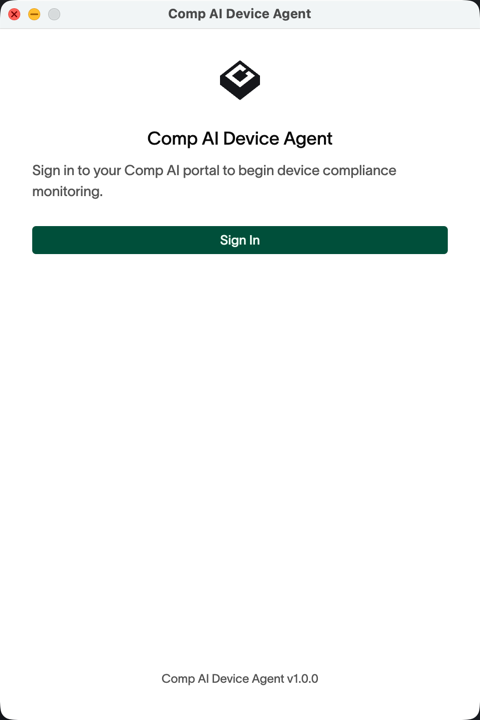
- Registers your device with your organization(s)
- Runs the first compliance check immediately
- Starts checking every hour in the background
Using the Device Agent
After signing in, the agent lives in your system tray (menu bar on macOS, system tray on Windows/Linux). Click the tray icon to open the status window.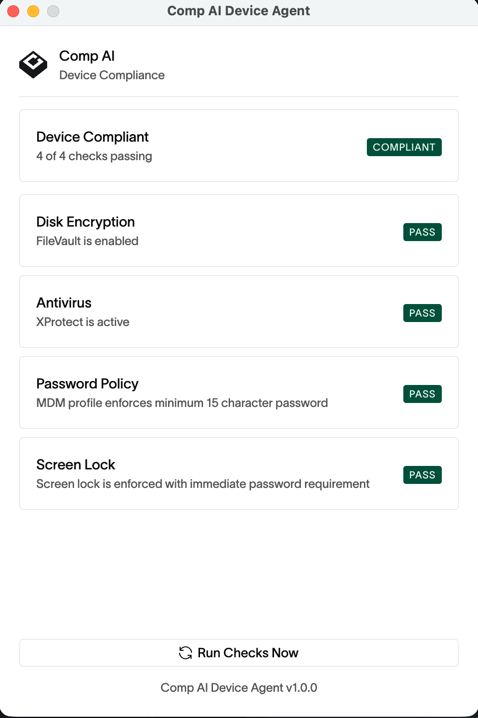
- Compliance status — whether your device is compliant or needs attention
- Individual checks — each of the four security checks with Pass/Fail status
- Remediation options — for any failing check, the agent offers a way to fix it
Tray Icon Status
Fixing Failing Checks
When a check fails, the agent provides remediation options depending on what can be done automatically:Password Advisory on a Passing Check
The Password Policy check can also show a note on a check that is passing. If the agent has seen the enforced minimum go up and can date that change, and your password was last set before that date, the card adds a sentence saying so. On macOS it also offers a Change Password button that opens System Settings → Touch ID & Password; on Linux the same note appears with steps instead of a button. Windows does not show this note. This never fails the check and never makes your device non-compliant. It is not a claim that your password is too short — the agent cannot read the length of anyone’s password on any platform. All it knows is that your password predates the rule, so it may be shorter than the rule now requires. Changing your password clears the note at the next check.Tray Menu Options
Right-click (or click on macOS) the tray icon to access:- Run Checks Now — trigger an immediate compliance check
- View Details — open the status window
- Start at Login — toggle whether the agent launches automatically when you log in (enabled by default)
- Sign Out — sign out of the agent
- Quit — close the agent completely
Verifying on the Portal
After the agent runs its first check, you can verify your device compliance status on the Employee Portal. The Device Agent task shows your device name, platform, and whether all security checks are passing. The portal updates automatically — it polls your device status every 30 seconds while the page is open.Troubleshooting
Agent won't sign in
Agent won't sign in
- Make sure you’re using the same email address you use for the Employee Portal
- Check your internet connection
- Try quitting the agent completely and reopening it
- If using Google or Microsoft sign-in, make sure popups are not blocked
Checks are failing unexpectedly
Checks are failing unexpectedly
- Click Run Checks Now to refresh the results
- Review the failing check details — the agent shows what it detected
- Use the remediation option provided (Fix, Open Settings, or View Guide)
- Some changes (like enabling FileVault) require a restart to take effect
Password Policy says Comp AI could not determine the minimum password length
Password Policy says Comp AI could not determine the minimum password length
This means the agent could not establish a minimum it is willing to stand behind. Rather than report a number the device does not enforce, it says so and the check fails. There are a few reasons it happens: nothing on the device enforces a configurable minimum; a configuration file could not be read, so a setting that overrides the rest may be hiding in it; a value is written in a form libpwquality itself rejects; or a minimum is configured but is not actually binding — Then click Run Checks Now. The failing check’s View Guide option shows these same steps, and reports which setting is overriding the drop-in when one is.
enforcing = 0 makes libpwquality warn about a weak password and accept it anyway, and local_users_only applies the rules only to accounts in /etc/passwd. When the agent was specifically denied permission to read a file, the card says that instead.The failing check’s View Guide option names which of these it found, so start there.On Linux — including a stock Ubuntu install, which has no pam_pwquality in its PAM stack — an administrator can install and configure it:Agent is not visible in the system tray
Agent is not visible in the system tray
- macOS: Look in the menu bar at the top of your screen. The icon may be hidden — check the overflow area (click the
>>or similar) - Windows: Click the up arrow in the system tray to see hidden icons
- Linux: Check your desktop environment’s system tray or notification area
- The agent may need to be reopened from your Applications folder
Portal shows device as non-compliant even though agent shows all checks passing
Portal shows device as non-compliant even though agent shows all checks passing
- Wait up to 30 seconds for the portal to refresh
- Click Run Checks Now in the agent to trigger a fresh report
- Check that the agent is signed in (tray icon should be green, not gray)
Migrating from FleetDM
If your device previously had the FleetDM agent (fleetd) installed, you should uninstall it after setting up the new Comp AI Device Agent. The new agent fully replaces FleetDM, and having both running is unnecessary. Follow the official uninstall guide for your platform: How to uninstall fleetdManual Evidence Collection
For users who cannot install the agent on their device, manual evidence of device settings is required. Below are the required pieces of evidence and where to obtain them.Windows Manual Evidence
Windows Manual Evidence
Windows 10 & 11
Enable BitLocker- Press Start → type Manage BitLocker → open it.
Take a screenshot of the BitLocker Drive Encryption window showing “On” for the C: drive. - Select the drive (usually C:) → click Turn on BitLocker.
- Save the recovery key to Microsoft Account / USB / secure location.
- Restart if prompted.
- Press Start → Settings → Personalization → Lock screen.
- Scroll down → click Screen timeout settings.
Take a screenshot showing the screen timeout set to 15 minutes. - Set Screen turns off = 15 minutes.
- In Settings → Accounts → Sign-in options → ensure Require sign-in is set to “When PC wakes up from sleep”.
Take a screenshot of the Sign-in Options page showing this setting.
- Press Win + R, type
secpol.msc, press Enter. - Go to Account Policies → Password Policy.
- Set Minimum password length = 8+.
Take a screenshot of the Password Policy window with “Minimum password length” = 8 or more.
- Settings → Update & Security → Windows Update.
- Select Advanced options → make sure Automatic updates are enabled.
Take a screenshot of the Windows Update settings page showing automatic updates turned on.
- Settings → Update & Security → Windows Security.
- Open Virus & threat protection → ensure Real-time protection is on.
Take a screenshot of the Windows Security window showing Real-time protection is ON.
Evidence gathered manually will be uploaded as a comment and attachment to the “Secure Devices” and “Device List” tasks with the user’s email of the device the evidence is for.
macOS Manual Evidence
macOS Manual Evidence
macOS (Monterey, Ventura, Sonoma, Sequoia)
Enable FileVault- Open System Settings (or System Preferences in older versions).
- Go to Privacy & Security → FileVault.
- Click Turn On FileVault → enter password.
- Record recovery key.
Take a screenshot of the FileVault settings page showing “FileVault is enabled for the disk.”
- System Settings → Lock Screen.
- Set Start screen saver when inactive = 15 minutes.
Take a screenshot showing the setting at 15 minutes. - Set Require password after sleep or screen saver begins = Immediately.
Take a screenshot showing “Require password immediately” is selected.
- Native macOS UI doesn’t enforce this; requires Terminal or MDM.
sudo pwpolicy -setglobalpolicy "minChars=8"— this adds a minimum alongside the stock FileVault policy rather than replacing the policy set, which is whatpwpolicy -setaccountpolicieswould do.- If set via Terminal, take a screenshot of
pwpolicy getaccountpoliciesconfirming the policy. - If enforced by MDM (Jamf, Intune, etc.), screenshot the compliance screen from the MDM portal.
- System Settings → General → Software Update.
- Click Automatic Updates → enable all options (Install Security Responses & System files, etc.).
Take a screenshot of the Automatic Updates options screen with all toggles enabled.
- macOS automatically runs XProtect in the background.
- Simply ensure macOS is fully updated.
Take a screenshot of the Software Update page showing the Mac is up to date.
Evidence gathered manually will be uploaded as a comment and attachment to the “Secure Devices” and “Device List” tasks with the user’s email of the device the evidence is for.
Linux Manual Evidence
Linux Manual Evidence
Ubuntu 20.04+ / Debian-based
Enable LUKS Disk Encryption- LUKS encryption is typically configured during OS installation.
- To verify, run:
lsblk -o NAME,TYPE,FSTYPE | grep crypt
Take a screenshot showing the encrypted volume.
- Open Settings → Privacy → Screen Lock.
- Set Automatic Screen Lock Delay = 15 minutes.
Take a screenshot showing the screen lock delay setting.
pam_pwquality, not through /etc/login.defs — nothing reads PASS_MIN_LEN, so a screenshot of it is not evidence that anything is enforced.- Confirm
pam_pwqualityis in the PAM stack:Stock Ubuntu does not ship it. An administrator installs it withsudo apt install libpam-pwquality(Debian/Ubuntu) orsudo dnf install libpwquality(Fedora/RHEL). - Set the minimum in a drop-in file — the same file the agent’s Fix writes:
- Confirm nothing overrides it. A
minlen=argument on thepam_pwqualityline, aminlenin/etc/security/pwquality.conf, or a drop-in that sorts after50-comp-ai.confeach win over this file. A positivedcredit,ucredit,lcreditorocreditanywhere in the stack lets a password be shorter thanminlenin exchange for mixing character types, andenforcing = 0orlocal_users_onlystops the minimum binding at all.
Take a screenshot of the drop-in’s contents and of thepam_pwqualityline.
- Verify ClamAV or another antivirus is installed and running:
- Alternatively, show AppArmor or SELinux is enforcing:
Take a screenshot of the output showing active protection.
Evidence gathered manually will be uploaded as a comment and attachment to the “Secure Devices” and “Device List” tasks with the user’s email of the device the evidence is for.